This guide covers the installation and configuration of portier® Vision 4.x and 5.x with the FIREBIRD 4 database solution, which is included at no extra cost.
Installation steps:
Software installation: Use the provided setup.exe. We recommend requesting the latest version from our support team. During installation, select the options for portier®Vision and FIREBIRD.
Database preparation: An empty database named portiervision.gdb is created in the program directory. Move it to the server that all users need to access.
Server preparation: FIREBIRD must also be installed on the server and running as a service.
Client configuration: 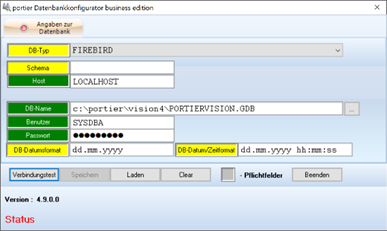 Open DBKONFIGURATOR.EXE in the program directory of the first client. Configure the connection to the server by entering the TCP/IP address or server name and the database path as seen from the server. Enter username and password if required. Run a connection test and save the settings to update the INI file.
Distributing the INI file: Copy the updated INI file to all other clients to complete the network installation.
Summary:
Your network installation of portier® Vision is now complete. All users benefit from centralised data storage and simplified access.