System Requirements
Preparation
Scenario 1: Upgrade with local Firebird server
Scenario 2: Upgrade with external Firebird server
Scenario 3: Upgrade with Microsoft SQL Server
Initial installation and login for Version 5
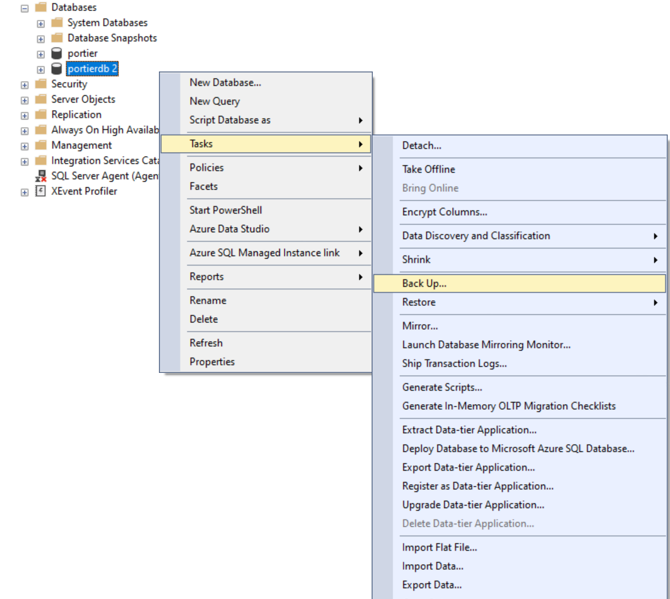
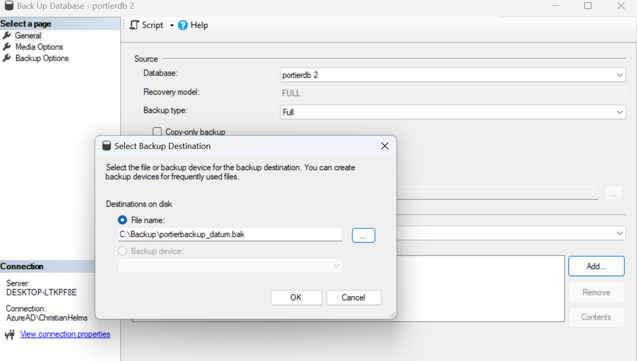
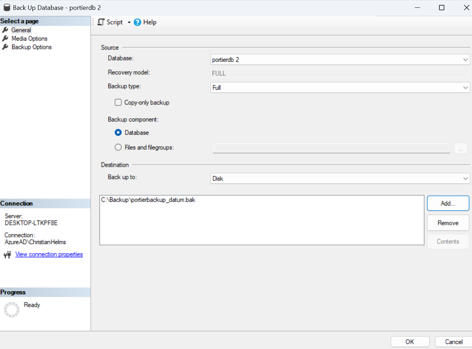
Create a backup: Back up your current database (PORTIERVISION.GDB for Firebird, or the relevant SQL Server backup via SQL Server Management Studio) and store it in a safe location.
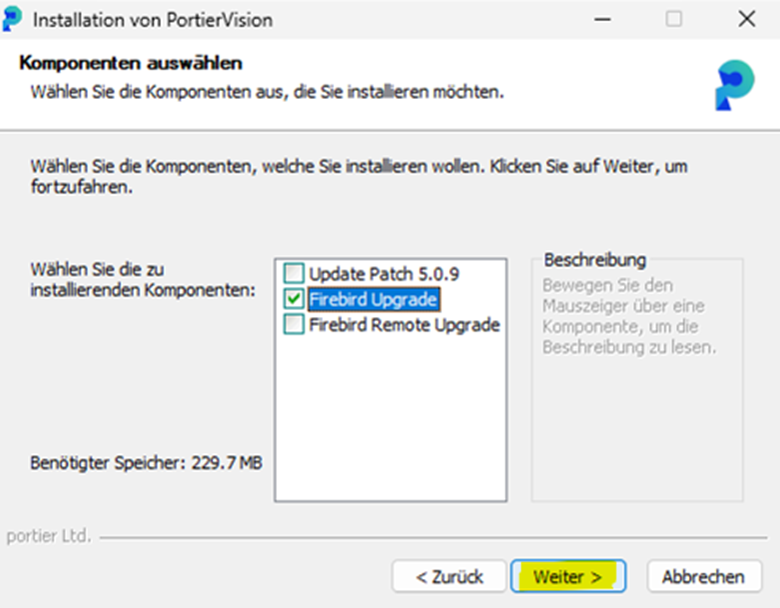
Step 1: Install Firebird 4.0

Accept the licence agreement
Select the target directory on the server where the existing Firebird 2.5 database is located
Confirm the removal of the old version (Firebird 2.5)
Step 2: Database Migration
Allow the installer to detect and automatically migrate the existing Firebird database
Complete the installation
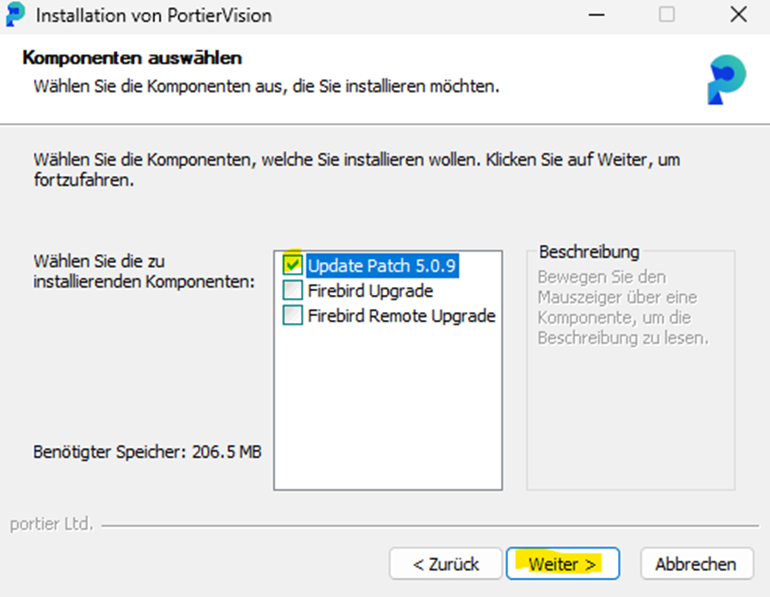
Step 3: Install portier vision 5.0.x
Run the installation program on the server and all client machines
Accept the licence agreement
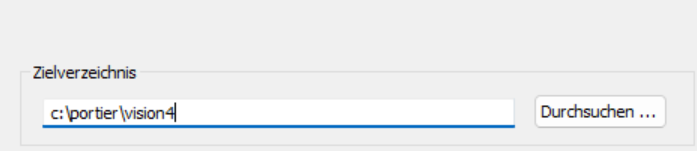
Enable the Update Patch option and specify the directory where portier vision is installed. It should be installed under C:/portier. Change the file path to point to portier 4 and install into the portier4 folder. Once installation is complete, rename the folder to portier 5 and update the file path in the DB Configurator accordingly.
Step 4: Run Tests
Check the database connection: open the DB Configurator in the portier directory (C:\portier\vision5\DB-Konfigurator.exe)
Verify the connection to the Firebird 4.0 database by entering the connection details and running a connection test
Confirm that all data has been migrated correctly and the application works properly
Step 1: Preparation
Make sure the external Firebird server is accessible and the Firebird 4.0 installation is reachable remotely
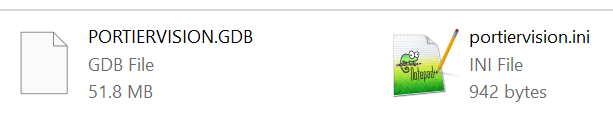
To confirm the database path and access, copy the portiervision.ini file from a client machine to the folder on the server where the database file (*.GDB) is located
Step 2: Firebird 4.0 Remote Upgrade
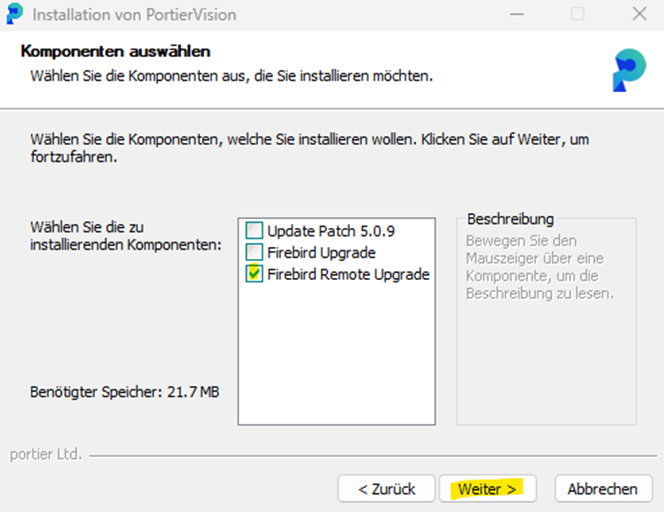
Start the Firebird 4.0 installation file and select "Firebird Remote Upgrade".
Specify the target directory on the external server where the database and PORTIERVISION.INI are located
The installer will detect the existing Firebird 2.5 installation and migrate the database
Step 3: Confirmations
Confirm the removal of the old version and shared files. Complete the installation.
Step 4: Install portier vision 5.0.x
Run the installation program on all relevant client machines.
Accept the licence agreement
Step 5: Connection and Tests
Database connection check: open the DB Configurator (C:\portier\vision5\DB-Konfigurator.exe)
Test the connection to the external Firebird 4.0 database by clicking Test Connection. Wait for the success confirmation.
Once you receive the success message, save the settings.
Step 1: Preparation
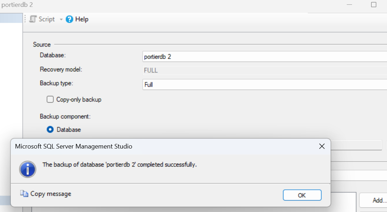
Backup with SSMS: Back up your MS SQL Server database using SQL Server Management Studio (SSMS) or your preferred backup tool.
Step 2: Install portier vision 5.0.x
Run the installation program on the server and client machines
Accept the licence agreement
Enable the Update Patch option and specify the installation directory (default: C:\portier\vision5)
Step 3: Integration and Tests
Database connection check: open the DB Configurator (C:\portier\vision5\DB-Konfigurator.exe), click Test Connection, and wait for the success confirmation. Once received, save the settings.
portier Initial Installation and Login